Overview
ADAMANT uses Fair dPoS (Delegated Proof of Stake) for blockchain consensus. Running your own node strengthens network decentralization and enables forging as a delegate. This guide covers installation on Ubuntu 20–24 (preferred) or CentOS 8, though other Linux-compatible systems may work.
A server or VPS with at least 2 GB RAM and 70 GB disk space (as of October 2025 for mainnet) is required.
Quick Installation
For first-time setup, run the installation script with sudo privileges. The script updates OS packages, creates an adamant system user, installs PostgreSQL, Node.js, and other dependencies, sets up the ADAMANT node, and optionally downloads a blockchain image. You will be prompted to set passwords for the database and system users.
Ubuntu:
sudo bash -c "$(wget -O - https://adamant.im/install_node.sh)"CentOS:
sudo bash <(curl -s https://adamant.im/install_node_centos.sh)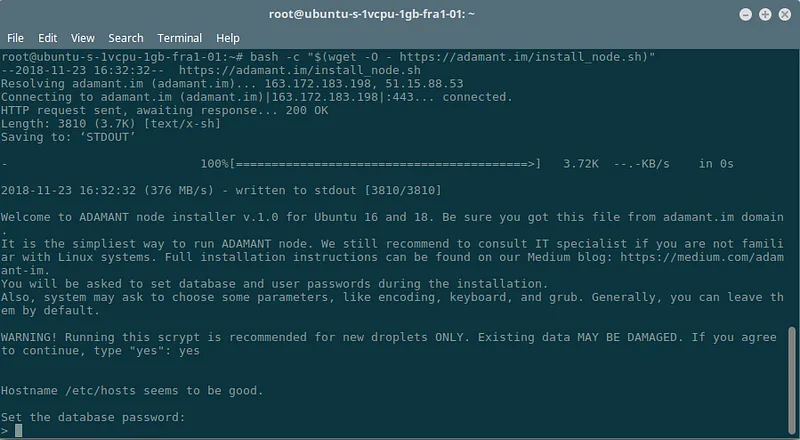
Use the screen tool to ensure the installation finishes even if your SSH connection drops. The process typically takes 10–20 minutes.
For testnet, add the appropriate flags:
Ubuntu:
sudo bash -c "$(wget -O - https://adamant.im/install_node.sh)" -O -b dev -n testnet -j jodCentOS:
sudo bash <(curl -s https://adamant.im/install_node_centos.sh) -b dev -n testnet -j jodManual Installation (Ubuntu)
These steps are for Ubuntu. On CentOS, use equivalent commands or the quick script above.
System Preparation
Update the system and install build tools, git, and Redis:
sudo apt update && sudo apt upgrade -y
sudo apt-get install -y build-essential curl automake autoconf libtool rpl mc git redis-server
PostgreSQL Setup
Add the PostgreSQL repository and install it:
sudo sh -c 'echo "deb http://apt.postgresql.org/pub/repos/apt/ `lsb_release -cs`-pgdg main" > /etc/apt/sources.list.d/pgdg.list'
wget -q https://www.postgresql.org/media/keys/ACCC4CF8.asc -O - | sudo apt-key add -
sudo apt update && sudo apt install -y postgresql postgresql-contrib libpq-dev
Create the database user and database. Use a strong password instead of the example below:
su postgres -c psql
CREATE ROLE adamant LOGIN PASSWORD 'HardPass111';
CREATE DATABASE adamant_main;
ALTER DATABASE adamant_main OWNER TO adamant;
\q
Create System User
adduser adamant
sudo usermod -aG sudo adamant
su - adamant
Install Node.js and PM2
Install nvm, then Node.js LTS (Hydrogen/v18), then PM2 as a process manager:
curl -o- https://raw.githubusercontent.com/nvm-sh/nvm/v0.39.5/install.sh | bashLog out and back in for nvm to take effect, then:
nvm i --lts=hydrogen
npm install -g pm2
Clone and Configure ADAMANT
git clone https://github.com/Adamant-im/adamant
cd adamant
npm i
cp default.config.json config.json
nano config.json
In config.json, set the database password to match what you created earlier. Set api/access/public to true if you want external API access (enables web server for API calls). Set consoleLogLevel to error for cleaner logs.
Optional: Blockchain Image
Downloading a pre-built blockchain image saves sync time but requires trusting the source. Skipping it means full verification of every transaction, which can take several days but proves chain consistency.
pm2 stop adamant
wget https://explorer.adamant.im/db_backup.sql.gz
gunzip db_backup.sql.gz
psql adamant_main < db_backup.sql
If you previously registered a node against this database, drop and recreate it first using dropdb and createdb.
Running and Verifying
Start the node using PM2, which forks the process into the background and auto-restarts on failure:
cd /home/adamant/adamant && pm2 start --name adamant app.jsCheck status with pm2 show adamant — it should be online. Query the blockchain height:
curl -k -X GET http://localhost:36666/api/blocks/getHeightOn start, height is 1 and increases as the node syncs. When sync completes, height matches other nodes on the network. Check logs with pm2 logs adamant if issues arise. You can also verify your node appears at the ADAMANT network monitor by searching for your IP address.
Enabling Public API
Public API lets ADAMANT messenger apps connect to your node. Internal (localhost) API is enabled by default. To enable external access, set api/access/public to true in config.json, then restart:
pm2 restart adamantVerify by opening http://<IP>:36666/api/blocks/getHeight in a browser.
Stopping and Updating
Stop the node with pm2 stop adamant. To update:
su - adamant
cd adamant
pm2 stop adamant
git pull
npm update
pm2 restart adamant
Autostart on Reboot
Add a crontab entry as the adamant user so the node restarts after a VPS reboot:
crontab -e@reboot cd /home/adamant/adamant && pm2 start --name adamant app.jsAlternatively, pm2 save and pm2 startup provide a more reliable autostart mechanism.
Recovery
If a node loses sync and restarts from height 0 — typically due to hardware errors or insufficient disk space — use the recovery script to restore from a blockchain image. This is especially useful for forging delegates who need to return to operation quickly:
sudo bash -c "$(wget -O - https://adamant.im/fix_node.sh)" -O -n mainnetAlternatively, follow the manual recovery steps described above for loading a blockchain image.